
How Do You Remove Window Tint? A Complete Step-by-Step Guide
Window tinting provides essential benefits for drivers, including UV protection, heat reduction, interior privacy, and improved comfort. However, window film does not last forever. Over time, prolonged exposure to heat and sunlight breaks down the chemical bonds in film and adhesive. When tint ages, it often turns purple, forms air bubbles, or begins peeling away from the glass. When this happens, car owners ask a simple question: How do you remove window tint safely without ruining your vehicle?
Removing old window film requires patience, specific tools, and correct technique. Doing it incorrectly can leave behind sticky adhesive residue, scratch your glass, or destroy delicate electrical components like rear window defroster lines. This guide explains why window tint needs to be replaced, details the standard methods for removal, outlines the risks of DIY projects, and explains how to upgrade your vehicle with modern window film.
Reasons to Remove Old Car Window Tint
There are two primary reasons vehicle owners choose to strip off existing window film: performance degradation and legal compliance.
Discoloration, Bubbles, and Reduced Visibility
Lower-grade dyed window films deteriorate under sunlight. As UV rays break down the dyes, the film shifts from dark gray or black to a distinct purple color. At the same time, heat causes the adhesive backing to release from the glass, creating pockets of trapped air. These bubbles distort your view, creating safety risks when checking blind spots or reversing at night. Once a film starts bubbling or changing color, its thermal protection properties are gone, making removal necessary.
California Tint Laws and Compliance
Another common reason for film removal is remaining compliant with local regulations. California tint laws set specific limits on light transmittance, known as Visible Light Transmittance (VLT):
- Front Windshield: Allows a non-reflective strip along the top 4 inches of the windshield.
- Front Side Windows: Must allow at least 70% of light through when combined with the factory glass.
- Rear Side Windows: Any level of darkness can be used.
- Back Window: Any level of darkness can be used, provided the vehicle has dual side mirrors.
If you purchased a used car with non-compliant front window film or received a fix-it ticket, the old film must be peeled off. Drivers in areas like Pasadena can review local Pasadena mobile car tinting options to replace illegal film with compliant window treatments.
Common DIY Window Tint Removal Methods
If you attempt tint removal on your own, the goal is to break the bond between the adhesive layer and the glass surface. Here are the most effective ways people approach this task at home.
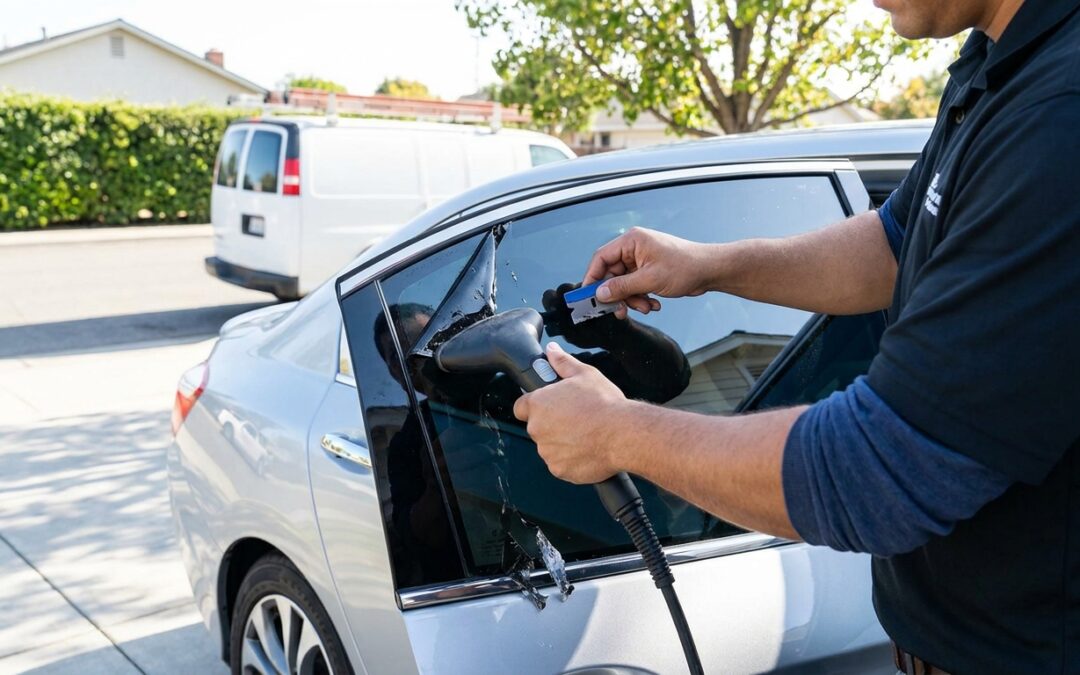
1. The Fabric Steamer Method
Using a handheld fabric steamer is generally considered the safest approach for DIY removal, particularly on side windows.
Step 1: Roll the window down slightly so the top edge of the glass is accessible.
Step 2: Direct steam along the top edge of the film from a distance of two to three inches. The heat softens the glue backing.
Step 3: Lift a corner of the film using a fingernail or a plastic scraper.
Step 4: Pull the film downward slowly while continuously directing steam directly at the seam where the film meets the glass.
Step 5: Peel the entire sheet off in one piece if possible, then wipe down the glass.
2. The Solar Heat and Soap Method
This method uses natural sunlight and a plastic barrier to trap heat against the window.
Step 1: Cut dark plastic trash bags to fit the shape of the window.
Step 2: Spray soapy water or glass cleaner containing ammonia onto the inside of the window surface.
Step 3: Place the plastic bag over the wet film on the inside, smoothing it out so it sticks to the wet surface.
Step 4: Park the vehicle in direct, bright sunlight for 30 to 45 minutes to let heat build up beneath the plastic layer.
Step 5: Peel the plastic away and lift the window film from a top corner, pulling gently across the surface.
Cleaning Up Leftover Glue Residue
Peeling off the top layer of plastic film rarely removes all the adhesive. To clean off remaining glue from roll-down side windows, spray the surface with soapy water or isopropyl alcohol and scrape lightly with a new stainless steel razor blade held flat against the glass. Always keep the surface wet to avoid scratching.
Risks and Mistakes During DIY Tint Removal
While stripping window film at home appears straightforward, several hazards can lead to expensive repairs if handled incorrectly.
Defroster Line and Radio Antenna Damage
The largest risk occurs on the rear windshield. Modern vehicles feature thin, metallic heating lines printed directly onto the inner surface of the back glass. Many cars also feature radio or GPS antennas embedded in the same location. Using a metal razor blade or forcefully pulling hardened film off the rear window can tear these metallic grid lines right off the glass. Once broken, the rear defroster will fail, often requiring a complete windshield replacement.
Scratched Glass and Interior Damage
Improper blade angles or dry scraping can leave permanent scratches across automotive glass. In addition, chemical cleaners, isopropyl alcohol, or ammonia solutions can drip into the door panel assembly. This runoff can stain leather upholstery, ruin fabric trim, or short-circuit power window switches located on the door controls.
Upgrading to High-Performance Ceramic Window Film
Once old, degraded tint is removed and the glass is fully prepped, replacing it with modern film transforms your driving experience. Older films relied primarily on dark dyes that absorbed heat without blocking harmful infrared radiation. Modern film technology offers far better thermal rejection without requiring opaque dark shades.
When selecting your new setup, review available carbon and ceramic tint options to select the ideal balance of privacy and solar protection:
- Carbon Window Tint: Offers a smooth matte finish that will never fade to purple. Carbon blocks significant ultraviolet rays and infrared heat while eliminating glare.
- Ceramic Window Tint: The premium standard in solar control. Ceramic film contains non-metallic, non-conductive ceramic particles that block high levels of infrared heat and UV rays, keeping interior cabin temperatures low even on hot summer days.
Both options come in light levels like 50% VLT for subtle clarity down to 5% VLT for maximum rear privacy. Because ceramic materials contain no metal or dyes, they do not block cell phone signals or degrade over time. You can check out examples of recent tint installations to see how various shade percentages look on different vehicle models.
Professional Mobile Tinting in Los Angeles
Instead of risking damaged defroster lines, chemical stains, or spending hours scraping sticky glue off your windows, turn to experienced professionals. Legacy Mobile Tints brings high-grade window tint removal and installation services directly to your residence or workplace.
Our fully equipped mobile service vans cater to vehicle owners across the greater Los Angeles area, including Pasadena, Glendale, Burbank, Arcadia, Alhambra, Monterey Park, Montebello, South Pasadena, and San Marino. We handle the entire job on-site—stripping old tint, cleaning residual glue cleanly, and installing precision-cut carbon or ceramic film.
Schedule Your Mobile Tint Service Today
Ready to replace faded, bubbling tint with high-performance heat control? Skip the hassle of taking your car to a physical shop and let our technicians come to you.
To request your mobile tint quote, contact our team online or call Legacy Mobile Tints directly at 818-605-5855 today.